How to set up a GLightbox image gallery on your website
Do you want to add an interactive image gallery to your website but don't know how? This tutorial is for you! Here's how to set up an image gallery using GLightbox, step-by-step.
Bear in mind that this is my first tutorial, and feel free to comment below if you have questions or issues!
What is GLightbox?
GLightbox is a javascript lightbox. It's lightweight, responsive, relatively easy to set up and customize, and it allows you to make image galleries like this one below! This tutorial focuses on making a simple image gallery, but GLightbox offers a lot more features too.


Set up instructions:
1. Download GLightbox files
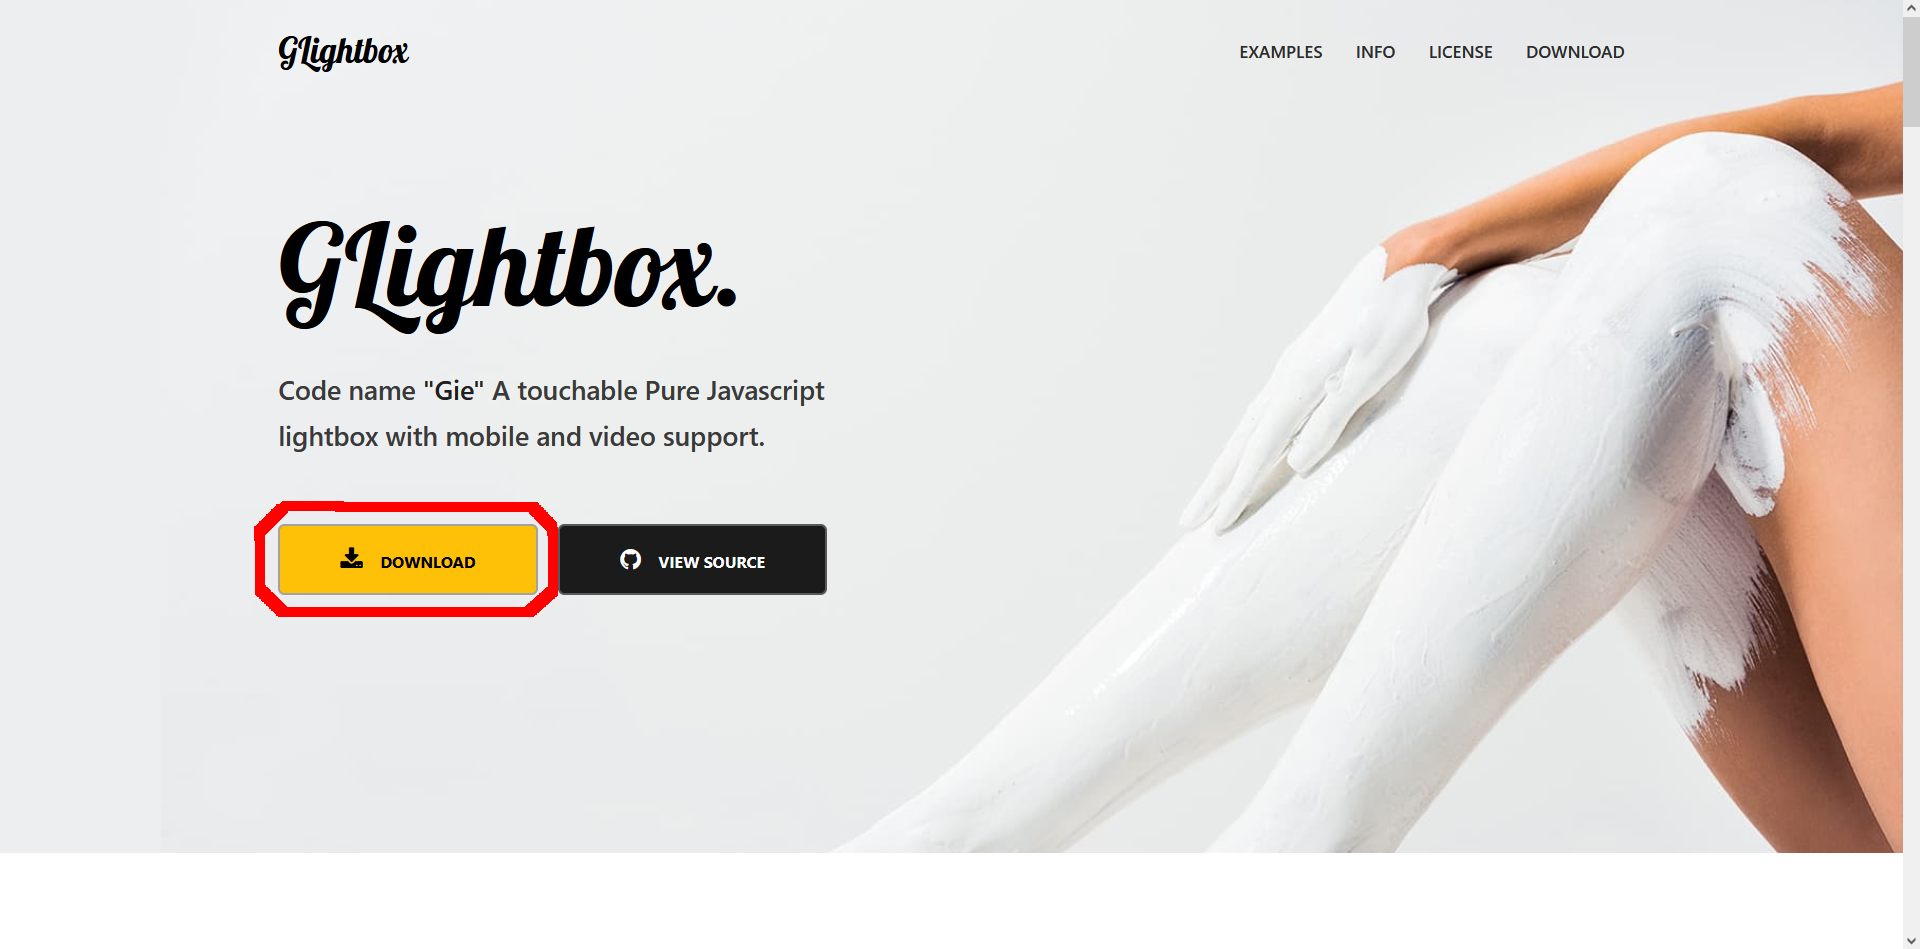
The first step is to get the needed javascript and css files. Go to GLightbox's website and click download. The link should take you to GLightbox's most recent release files. Click on Source Code (zip) to download it to your computer.

Now, the important part: the only files you need from the Source Code zip file are in the dist folder. Go ahead and copy this folder over to your site's directory. I also recommend renaming the dist folder to glightbox, just for clarity.
2. Create a setup javascript file
Make a new javascript file. I recommend naming it something like glightbox-setup.js and moving it into the glightbox (or however you named it) folder, to keep everything in one place.
This is the file structure you should have available to you right now:
Now for the fun part! Copy the below code into your glightbox-setup.js file. This is the basic setup that will allow you to create image galleries in your html files.
const glightbox = GLightbox(); // initializing the glightbox gallery variable

// if you want multiple separate galleries on single html page
// initialize more variables like this
// const glightbox2 = GLightbox();

function setupGallery(lightbox, selector) {

    // if a gallery is already set up, destroy it first to avoid errors
    if (lightbox) {
        lightbox.destroy();
    }

    // set up a new gallery
    lightbox = GLightbox({
        selector: `.${selector}`, // images with the selector class will be added to gallery
    });
}

// set up the gallery when the page loads
document.addEventListener("DOMContentLoaded", function () {

    // chosen selector class for images is glightbox
    setupGallery(glightbox, "glightbox");

    // if you want multiple separate galleries on single html page
    // set up every gallery with a different selector
    // setupGallery(glightbox2, "glightbox2");

});
This code sets up a simple gallery with a set selector attribute when the page loads. Remember the selector you choose. This is the class an item has to have to be added to the gallery view.
3. Prepare your html file
Now, with all the basic javascript code complete, you can move on to actually connecting it to the html!
Open the html file you want to have the gallery in (or create a new one). You'll have to link the glightbox.css file inside the <head> tag, and both the glightbox.js and glightbox-setup.js scripts at the bottom of the <body> tag.
The basic shape of your html file should look similar to this:
<!DOCTYPE html>
<html lang="en">
<head>
    <meta charset="UTF-8">
    <meta name="viewport" content="width=device-width, initial-scale=1.0">
    <title>Your html document</title>

    <link rel="stylesheet" href="enter path to glightbox.css file here"/>

</head>
<body>

    <!-- your html content here -->

    <script src="enter path to glightbox.js file here"></script>
    <script src="enter path to glightbox-setup.js file here"></script>

</body>
</html>
4. Add your images to the gallery
The only thing left to do is add the images themselves to the html file. GLightbox expects a specific html format - for example, this is the html code of the gallery from the top of this page:
<body>

    <!-- ... -->

    <div class="gallery">
        <a
            href="./_img/glightbox/img1.png"
            data-description="you can add descriptions to images too!"
            data-type="image"
            class="glightbox"
        >
            <img src="./_img/glightbox/img1-thumbnail.png">
        </a>

        <a
            href="./_img/glightbox/img2.png"
            data-description=""
            data-type="image"
            class="glightbox"
        >
            <img src="./_img/glightbox/img2-thumbnail.png">
        </a>

        <a
            href="./_img/glightbox/img3.png"
            data-description=""
            data-type="image"
            class="glightbox"
        >
            <img src="./_img/glightbox/img3-thumbnail.png">
        </a>
    </div>

    <!-- ... -->
    <!-- script links here -->

</body>
Each <a> tag is an image in the gallery. Take a look at the highlighted parts - the <a> tags have a glightbox class, which is the selector used in the glightbox-setup.js file earlier. In this html file, every <a> tag that follows this format and has the correct selector class will be added to the GLightbox gallery.
The href attribute of the <a> tag is where the link to the actual image should be. The <img> elements are just the thumbnails.
Summary
That's basically it! Feel free to let me know if there's anything I missed, or if this setup just isn't working for you. And if you want to see what else GLightbox can do and experiment with more features and options, check out its documentation!
Additional info:
* When it comes to styling the gallery view, you can look through the glightbox.css file and change some things, but be careful not to break anything! You can always add your own styles on top of the existing ones in a new css file too.
* A lot of the useful gallery set up options are turned on by default - like being able to zoom in on images, or touch and keyboard control. If you want to further customize your gallery, head over to the list of lightbox options available.
* If you need more than one separate gallery in a single html file, simply initialize and set up more galleries in the glightbox-setup.js file, just like the commented out code. Remember to assign a correct selector class to each of your gallery items in the html file!